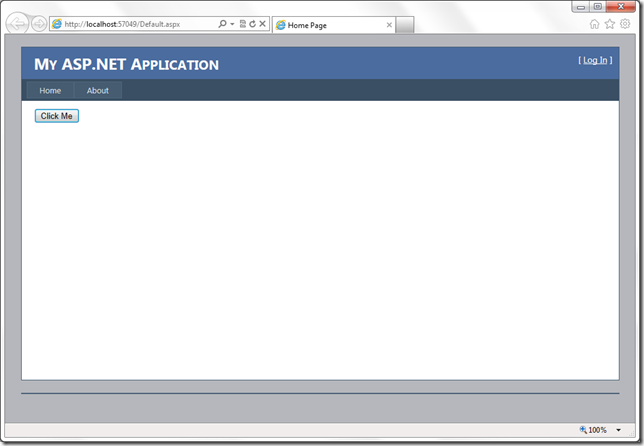
As I mentioned in another post, AJAX is used to make web pages more interactive and responsive. We saw that the UpdatePanel control is an easy way of adding AJAX to a web page.
But there are times when an operation can’t be completed quickly, so to the user it might seem like nothing is going on.
ASP.NET offers the UpdateProgress control to show HTML content to the user while the browser is waiting for an AJAX operation to complete.
Please note that an UpdateProgress control can be associated to a specific UpdatePanel control, or it can be triggered by any UpdatePanel in the page.
Go ahead and create a new ASP.NET Web Application.
Open the Default.aspx page and copy the following code.
1
2
3
4
5
6
7
8
9
10
11
12
13
14
15
16
17
18
19
20
21
22
23
24
25
26
27
28
29
30
31
32
33
34
35
36
37
38
39
40
41
42
43
44
45
46
47
48
49
50
51
52
53
54
55
56
57
58
59
60
| <%@ Page Title="Home Page" Language="C#" MasterPageFile="~/Site.master" AutoEventWireup="true" CodeBehind="Default.aspx.cs" Inherits="CoverScreen._Default" %><asp:Content ID="HeaderContent" runat="server" ContentPlaceHolderID="HeadContent"></asp:Content><asp:Content ID="BodyContent" runat="server" ContentPlaceHolderID="MainContent"> <style type="text/css"> .overlay { position: fixed; z-index: 98; top: 0px; left: 0px; right: 0px; bottom: 0px; background-color: #aaa; filter: alpha(opacity=80); opacity: 0.8; } .overlayContent { z-index: 99; margin: 250px auto; width: 80px; height: 80px; } .overlayContent h2 { font-size: 18px; font-weight: bold; color: #000; } .overlayContent img { width: 80px; height: 80px; } </style> <asp:ScriptManager ID="ScriptManager1" runat="server"> </asp:ScriptManager> <asp:UpdatePanel ID="UpdatePanel1" runat="server"> <ContentTemplate> <asp:Button ID="Button1" runat="server" Text="Click Me" onclick="Button1_Click" /> </ContentTemplate> </asp:UpdatePanel> <asp:UpdateProgress ID="UpdateProgress1" runat="server" DisplayAfter="0" AssociatedUpdatePanelID="UpdatePanel1"> <ProgressTemplate> <div class="overlay" /> <div class="overlayContent"> <h2>Loading...</h2> <img src="Images/ajax-loader.gif" alt="Loading" border="1" /> </div> </ProgressTemplate> </asp:UpdateProgress></asp:Content> |
First, you’ll see a style section. The overlay class will be used to cover the screen with a semi-transparent div. That div will be made visible by the UpdateProgress control when necessary.
In order to use the UpdatePanel and UpdateProgress controls we need to add a ScriptManagercontrol.
Then, we add the UpdatePanel with a button to trigger an asynchronous post-back.
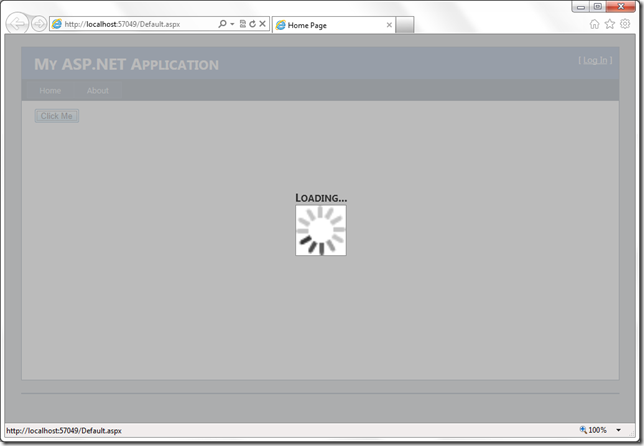
Finally, we add the UpdateProgress control. This control has the div elements that will be made visible every time the button is clicked. The first div will cover the whole screen thanks to the style we defined earlier. Then, we show another div with some text and an image in the center of the screen.
For the image I created an animated gif on http://ajaxload.info/.
In this sample, we explicitly associated the UpdateProgress to the UpdatePanel. This is not really necessary since we only have one UpdatePanel in the page.
Now edit the code behind.
1
2
3
4
5
6
7
8
9
10
11
12
13
14
15
16
17
| using System;namespace CoverScreen{ public partial class _Default : System.Web.UI.Page { protected void Page_Load(object sender, EventArgs e) { } protected void Button1_Click(object sender, EventArgs e) { System.Threading.Thread.Sleep(3000); } }} |
All we do here is to pause the thread for 3 seconds when the button is clicked so that we can see the UpdateProgress in action.
Run the project.

Click on the button.

The Loading text and image will appear for 3 seconds.
Please leave your comments.
No comments:
Post a Comment